
Here is the finished product, I made one for my mother-in-law for fall.
First step gather all your supplies, I use a flat folding surface, a ruler, pencil, clear invisible tape, a stapler, and 6 square sheets of paper in the color you want. You can use all white if you want a snowflake, or several different colors at once. I use colored paper thats a little thicker than printing paper, but its not construction paper. I get mine in milti-colored reams at Jo-anne Fabric and Crafts. You can use printer paper for snowflakes it makes them more wispy.

Now take a sheet of paper and fold it in half triangularly.


This is what it will look like when you unfold it.

Now you will start taping. I use Clear Invisible tape when I make colored stars because regular tape shows up white on the paper. Regular tape is fine if you are making white snowflakes. Start on the inside and tape the corners together.

Then turn the paper over and tape the next sections corners together on the other side.

Keep turning it over and taping the corners alternating sides.
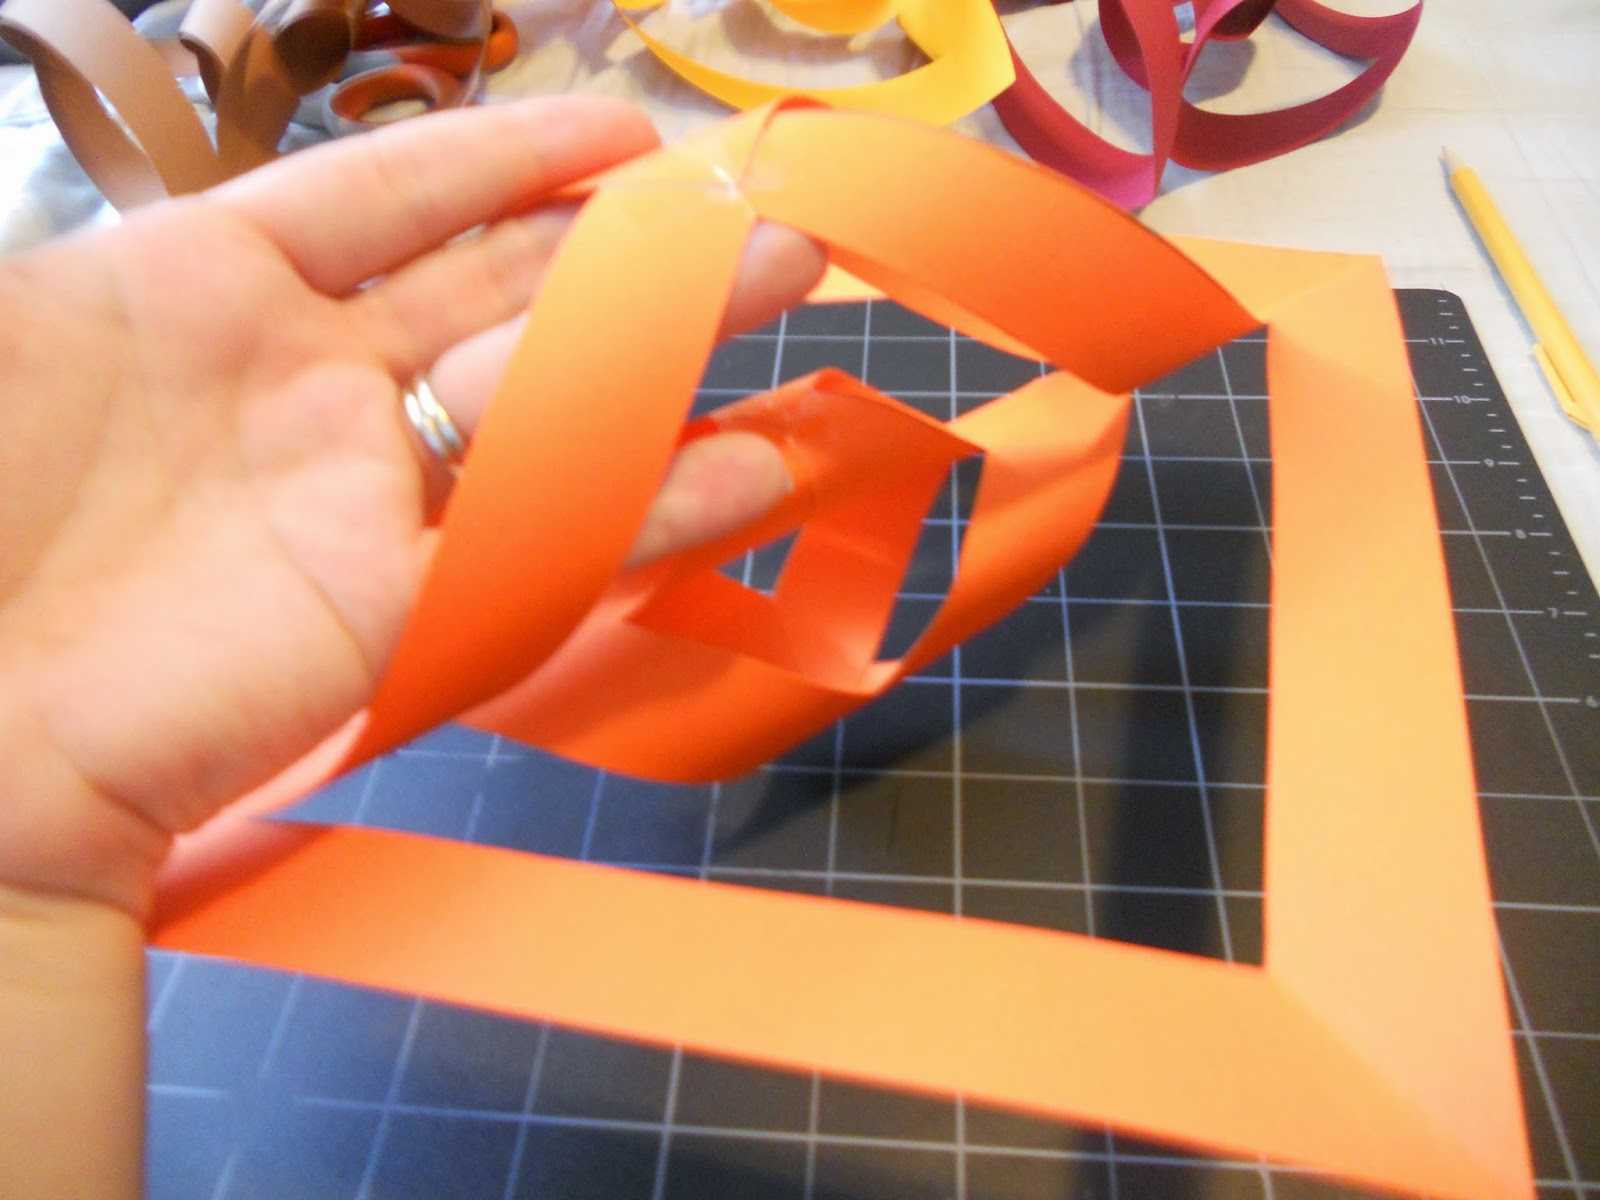
Here is what 1 finished section looks like.

Now make 5 more. Next set out your finished pieces and arrange them in the order you want them to be in. Make sure that they are all facing the same direction.

Now you can grab 3 at a time, by the corners that are in the center of the star.

Staple them together. Then do this with the other 3, and then staple the 2 sections together.

Almost done, this looks fine, but it will droop so you need to grab all the touching edges and staple those together too. This will spread it out and keep it from drooping when you hang it.

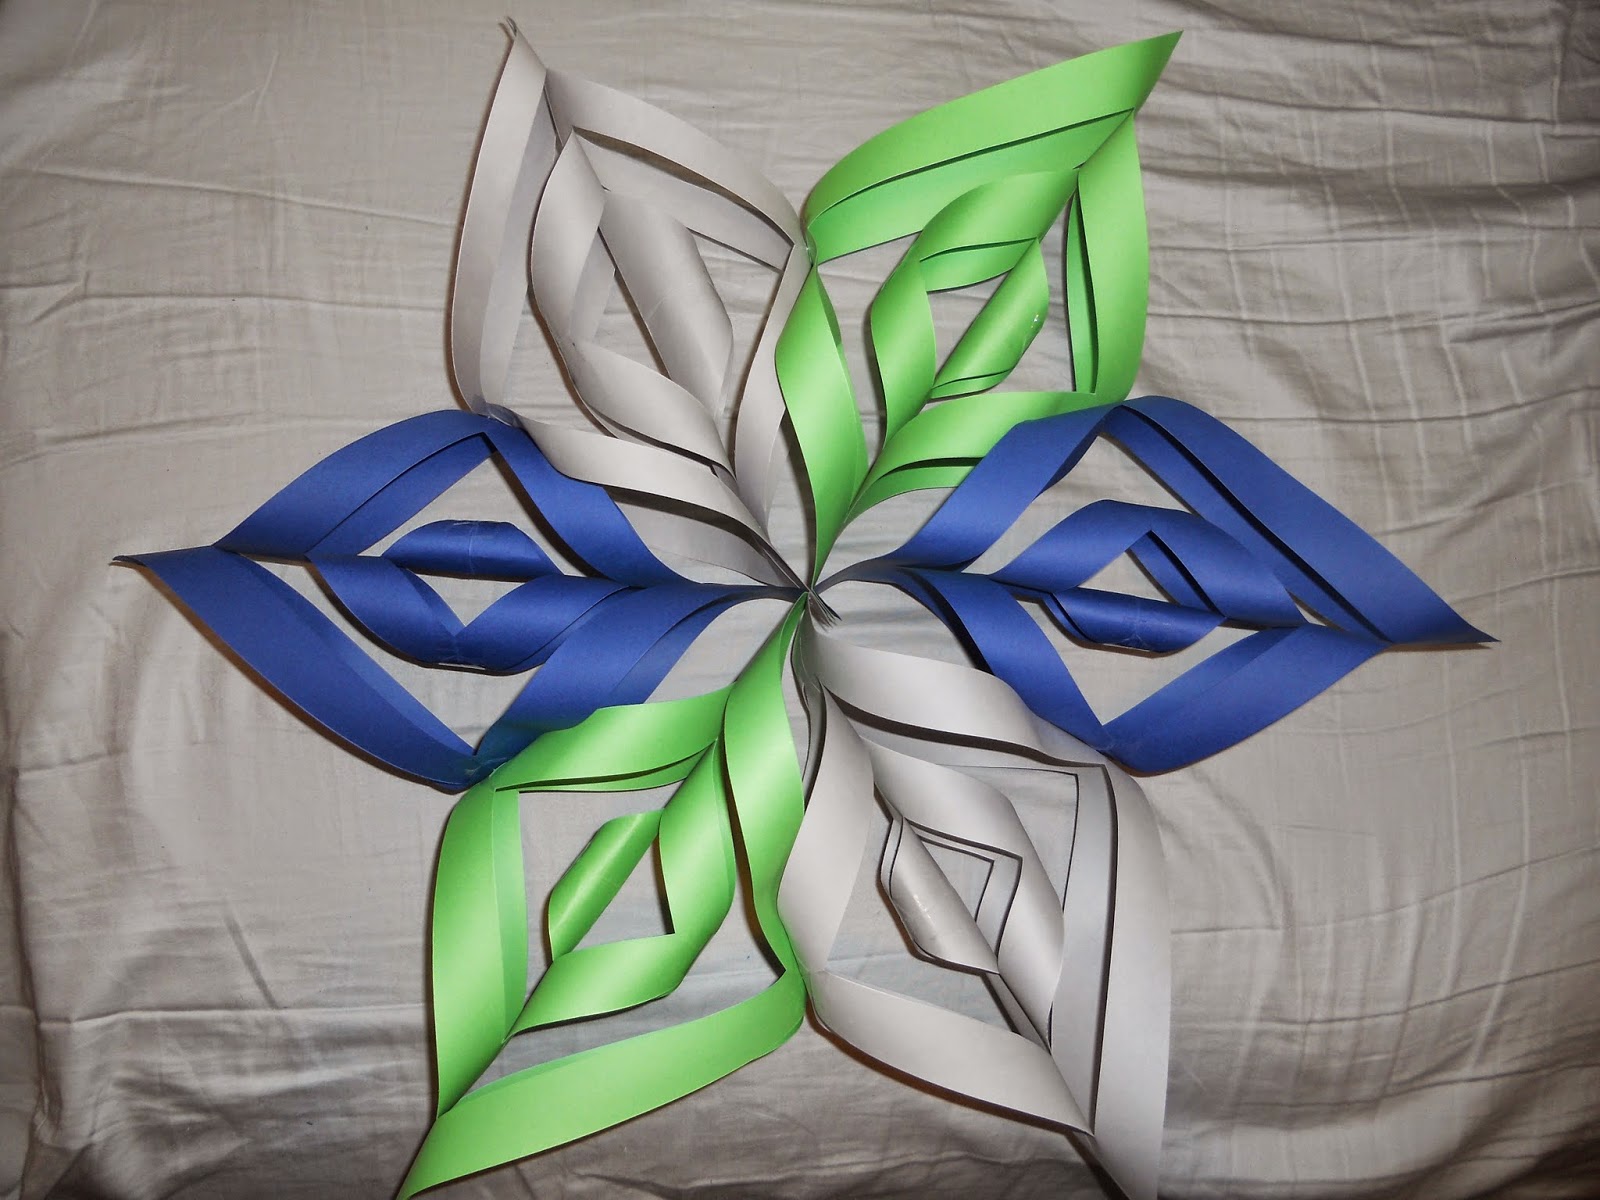
Now here is the final product. I usually string it with thread or fishing line. Or you can tack in directly to your wall.

Here are a few more I did. A pink and white one for a birthday party, a Seahawks inspired one, and a few different sizes for a South Western theme.


That's all, I hope this was easy to follow and you have tons of fun decorating with them. Please leave a comment if this was confusing at all. Thanks for reading.